
After deciding it
was time to get all of our jewelry--well some of our jewelry at
least--up in our Etsy Store
(http://www.etsy.com/shop/PartnersInCharms), we planned a photography
day at Stef’s house. We had just received Cloud Dome’s newest
creation – a Universal Disc for the Cloud Dome that was especially
made for the original Cloud Dome and a Disc designed especially for
working with just smartphones– and were anxious for a chance to see
how it worked.
Remember that
neither of us is anywhere near being a professional photographer and
so that is the beauty of the iPhone/iPad used in connection with the
Cloud Dome equipment – you can get good results being a total
rookie!
Since we knew we
were going to go at it intensely this is how we set up:
Equipment:
Large table that we
could easily move around
iPhone 4s
iPhone 5
iPad Air
2 Nimbus Cloud
Domes for Smartphones (we each have one which was very helpful)
Nimbus Large
Earring and Necklace Stand
Nimbus Dome
Photography Base
Nimbus Cradle with
Tripod mount
Cloud Dome
Universal Disc for
Cloud Dome
Background Pad
Lighting
Trays of jewelry
separated by type to photograph
Empty trays to put
jewelry pieces in after they had been shot
Props and display
pieces
Small piece of
white or neutral color polymer clay or museum clay
Basic jewelry tools
Pop can (more on this later)
Cloud Dome box (more on this later, as well!)
Snacks and drinks!
We set the table up
so that we could both shoot at the same time. Since we had divided
the jewelry into types – rings, bracelets, necklaces and earrings--we set up two stations to photograph.
 |
| Setting up the table with lights, Cloud Dome equipment and jewelry organized by type into trays. Oh, and of course coffee and pop to keep us going! |
I took pictures of
earrings, while Stefanie worked on taking images of bracelets and
rings.
 |
| Stefanie attaching her iPhone to the Nimbus Cloud Dome |
 |
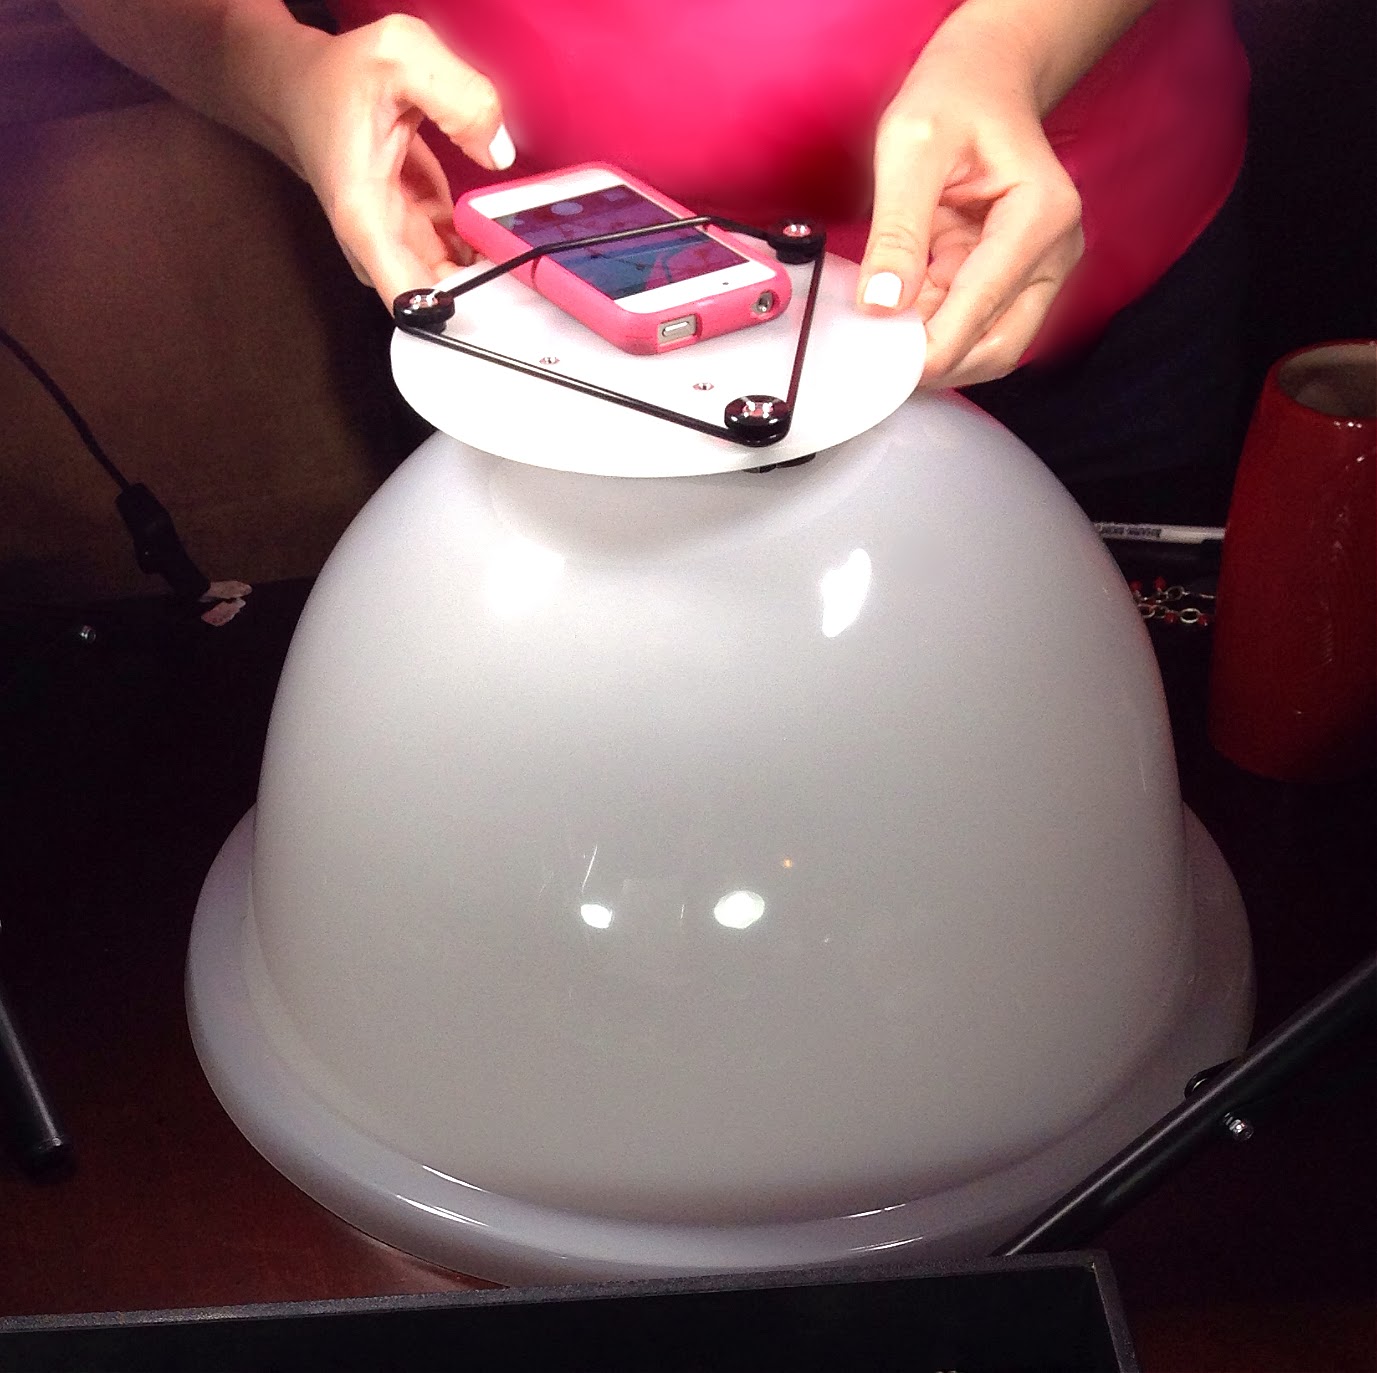
| Setting up the Nimbus Cloud with the Nimbus Large Earring and Necklace Stand. The iPhone goes into the elastic triangle band to hold it in place, but I needed it to take this photo! |
Once all those smaller jewelry items were shot, we worked together on the larger
necklaces, with Stef doing the camera work while I removed and
replaced product tags.
 |
| Stefanie arranging necklace on Cloud Dome Background Pad. |
 |
| Taking picture using the new SmartPhone attachment for the Cloud Dome. Love it!!! |
 |
| Here we are using our iPad and the Universal Disc for the Cloud Dome. This is great but we really found it was much easier to use the iPhone which also has a better camera. |
Altogether we
probably put in about 8 hours of work, taking about 300 pictures of
approximately 125 pieces of jewelry! Incredible!!!
Good news is that
we got that much done. Bad news is that now we have to edit the
images in Camera+ and PhotoShop Touch and write great descriptions to
post them to Etsy (http://www.etsy.com/shop/PartnersInCharms)!


Some images that we have edited and are up on our Partners in Charms Etsy store: http://www.etsy.com/shop/PartnersInCharms
Be sure to watch for Part Two of Lights! iPhones! Jewelry! where we will share some of the time and energy-saving tips we learned from this fun experience!
We want to thank Cindy Lichfield, Cloud Dome inventor, for all of her fabulous support! You can contact her at: http://www.clouddome.com/store/contactus.html
Happy beading!
Kathy and Stef
I found this really interesting, just went to cloud dome site. this may be what I have been looking for to help me take better pictures of my jewelry. Thanks
ReplyDeleteWow, no wonder you get such amazing pictures. TFS!
ReplyDelete