In
this blog we are going to share some of the time and energy-saving
tips we learned during our Lights! iPhones! Jewelry! photo shoot to
start getting our jewelry up on our Etsy store:
http://www.etsy.com/shop/PartnersInCharms. In that blog we talked
about what equipment we used and how we set it up. If you haven’t
had a chance to read it yet, you can check it out here: http://partnersincharms.blogspot.com/2014/03/lights-iphones-jewelry-part-1.html
Our
tips…
Make
sure to sort your jewelry into types before shooting begins. This way
you can take all your earring photos, then your rings, etc. It saves
a ton of time because you don’t have to switch your set-ups as
often.
 |
We sorted our jewelry into trays and holders by type: rings, necklaces,
bracelets and earrings.
|
Keep a
set of basic tools handy in case a piece needs to be tweaked – like
tightening up a loop or adjusting a jump ring.
Have
extra hangtags and earring cards available in case you have to
replace a label after shooting.
 |
| Hang and earring tags, pen and basic jewelry tools were kept close at hand. |
Since
we didn’t have any museum clay available we used a small piece of
polymer clay to help with getting great shots of our rings.
Stef
found that a pop can was a handy way of getting a nice smooth line on
necklaces, especially those with ball chain.
 |
Our treats became tools when Stef discovered a great way to smooth out
jewelry chain with an empty pop can!
|
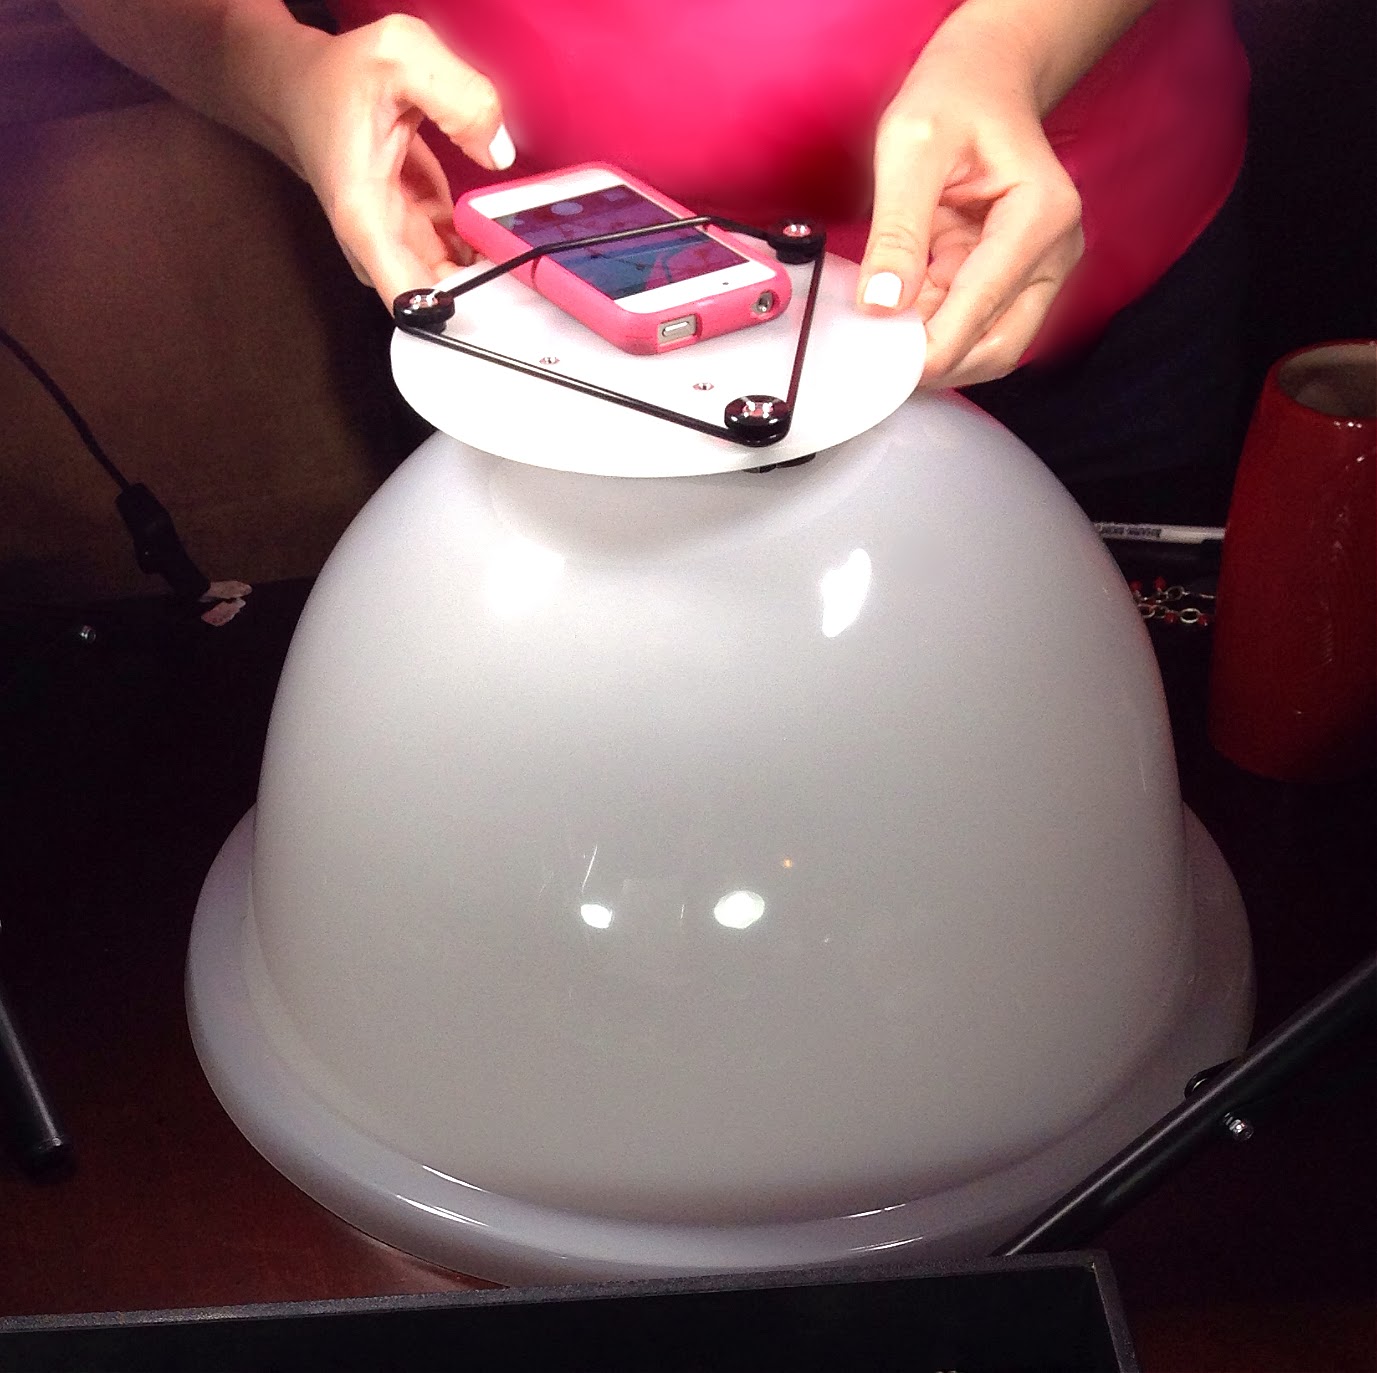
Watch
what you wear. We found that the bright pink top that Stef was
wearing reflected in some of the images, so wear white or a light
neutral color.
You
may want to have some props ready at hand such as velvet or leather
necks or small clear bottles that you can rest a bracelet against.
To get
an angled shot, we just left the iPhone on the Cloud Dome and then
picked up and angled the whole thing to get some interesting images.
 |
| By keeping the iPhone attached to the Nimbus Cloud, Stef was able to get some great shots of our beautiful rings that are always a challenge to photograph just right! |
Keep a
flat area of space clear where you are taking the pictures so you can
put your Cloud Dome down as you change out your pieces.
Make
sure your lighting is right. Take the time to adjust it to the best
possible, because this will save time when you are editing photos
later. If you are taking photos over a long period of time, you may
need to adjust your lighting as the day goes on if you are relying on
any natural daylight.
Periodically
clean the surface that you are photographing on. It is just amazing
how dust, fibers, cat hairs, etc. seem to come out of nowhere and you
don’t catch it until you go to editing and have 50 pictures with
one silly little bit of dust right in the middle of your image.
One
thing that we didn’t do that would have made photo editing easier
was to put a white tablecloth down on the table so if shots caught
some of the background, it wouldn’t be the dark brown table.
We
found that once the camera phone was attached to the Cloud Dome, the
rubber bands that held it on made it very difficult to access parts
of the screen to focus the image. We solved this problem by using a
stylus. It doesn’t have to be anything fancy, but something with a
fine tip to get in there close to the rubber bands.
 |
| Using a stylus pen to get even greater precision in our photos. |
Treats!!!
We are NOT photographers so this is not our favorite task in getting
our jewelry out in the marketplace, so we made sure we had plenty of
healthy (ha!) snacks to keep us energized!
Keep
the box your Cloud Dome comes in. It has a great foam lining that
kept the cats entertained and away from “helping” us while we
took shots!


Bella
and Yoshi both found the Cloud Dome box to be a super comfortable
place
to
curl up!
To sum
up – we had a blast and time seemed to fly as we worked together.
The Cloud Dome equipment with our iPhones really made taking that
many images possible. You can check out the Cloud Dome equipment at
http://www.clouddome.com/.
Here
are some of our completed pictures. Be sure to check out our Etsy
shop at http://www.etsy.com/shop/PartnersInCharms! Lots of wonderful
jewelry items to choose from!


We
want to thank Cindy Lichfield, Cloud Dome inventor, for all of her
fabulous support! You can contact her at:
http://www.clouddome.com/store/contactus.shtml
Happy
Beading!
Kathy
and Stef